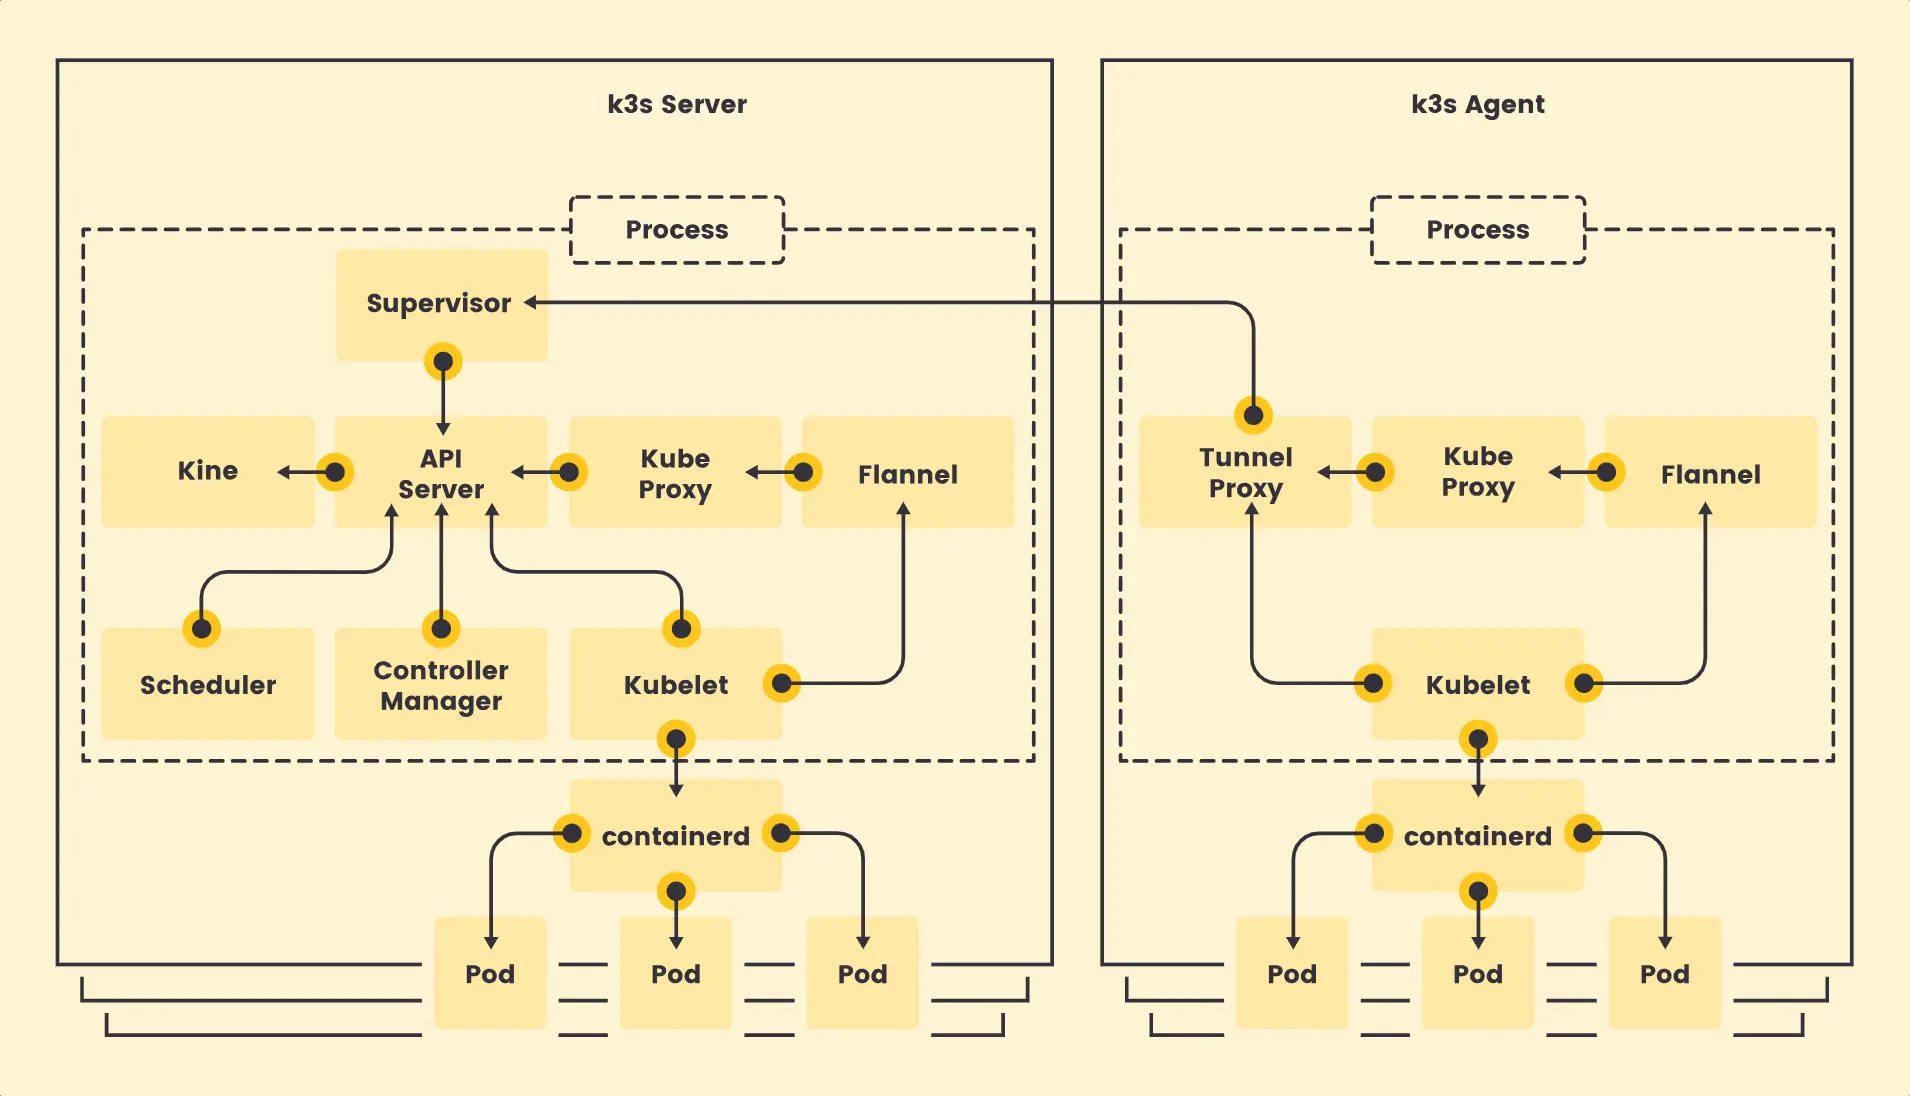
Kubernetes is a powerful tool for managing containerized applications, and K3s is a lightweight distribution of Kubernetes that is designed to be easy to install and run on almost any environment, including resource-constrained ones (such as a Raspberry Pi). In this blog post, we will show you how to set up a highly available K3s Kubernetes cluster, which will ensure that your applications remain available even if one of the nodes in the cluster goes down.
Prerequisites:
- Three or more servers or virtual machines with Ubuntu 20.04 or later. In this post we're going to use 6 nodes (3 K3s server nodes + 3 K3s agent nodes)
- A static IP address for each node
- A loadbalancer with a static IP address (we have a post about setting up haproxy as a load balancer for a HA cluster)
- (Optional) Kubectl installed on your local machine

Step 1: Install K3s on the first k3s server node
The first step is to install K3s on the first agent node in the cluster. You can do this by running the following command:
curl -sfL https://get.k3s.io | K3S_TOKEN=<my_token> sh -s - server --node-taint CriticalAddonsOnly=true:NoExecute --tls-san <ip_or_hostname_of_loadbalancer> --disable traefik --disable servicelb --disable local-storage --cluster-initK3S_TOKEN: The value of this argument should be a random long string. It should be the same token used when installing K3s on all nodes.
--node-taint CriticalAddonsOnly=true:NoExecute: Adds a kubernetes taint on K3s agent nodes to disables non critical workloads from running on them.
--tls-san <ip_or_hostname_of_loadbalancer>: Adds the hostname or IP of your laodbalancer as an alternative host of the tls certificate
--disable traefik: K3s comes with traefik as the default ingress controller. We disable it, to install ingress NGINX controller later on.
--disable local-storage: K3s comes with Rancher's Local Path Provisioner by default. We disable it, because we're going to use Longhon to manage our application storage.
This command will download and install the K3s binary and all of its dependencies. Once the installation is complete, you should be able to run the kubectl command and see the version of K3s that is running on the node.
Step 2: Install K3s on each of the other K3s server nodes
curl -sfL https://get.k3s.io | K3S_TOKEN=<my_token> sh -s - server --node-taint CriticalAddonsOnly=true:NoExecute --tls-san <ip_or_hostname_of_loadbalancer> --disable traefik --disable servicelb --disable local-storage --server https://<ip_or_hostname_of_first_k3s_server_node>:6443You should now have see all your K3s agent nodes, when you run the sudo kubectl get nodes command on any one of the agent nodes.
Step 3: Install K3s on each of the K3s agent nodes
The next step is to install K3s on the agent nodes. Run the following command:
curl -sfL https://get.k3s.io | K3S_URL=https://<ip_or_hostname_of_first_k3s_server_node>:6443 K3S_TOKEN=<my_token> sh -After installing K3s on the agents, you should be able to see all of your nodes, if you run the kubectl get nodes command
Step 4: Get kubeconfig file (optional)
The next step is to get the kubeconfig file from any of the K3s agent nodes. Run the following command:
sudo cat /etc/rancher/k3s/k3s.yamlCopy the contents and add them to your kubeconfig file, on your local machine. You should now be able to run kubectl commands against your cluster.
Step 5: Setup kubernetes load balancing with MetalLB
MetalLB is an open-source load balancer for Kubernetes clusters that run on on-premises or bare-metal infrastructure. It provides a way to expose services externally by assigning them an IP address from a configurable IP range. MetalLB can be used as an alternative to cloud-based load balancers, and it supports both Layer 2 and BGP modes.
To install MetalLB, run the following command:
kubectl apply -f https://raw.githubusercontent.com/metallb/metallb/v0.13.7/config/manifests/metallb-native.yamlAfter installing metalLB, you have to configure it with IPAdressPool & L2Advertisement resources to advertise the available IP adresses. Create a yaml file with you configuration and apply it with kubectl, with the following command:
kubectl apply -f metallb-config.yaml#metallb-config.yaml
apiVersion: metallb.io/v1beta1
kind: IPAddressPool
metadata:
name: first-pool
namespace: metallb-system
spec:
addresses:
- 192.168.10.0/24 #example cidr
- 192.168.9.1-192.168.9.5 #example ip range
- fc00:f853:0ccd:e799::/124 #example ipv6
---
apiVersion: metallb.io/v1beta1
kind: L2Advertisement
metadata:
name: ip-advertisement
namespace: metallb-system
spec:
ipAddressPools:
- first-pool
That's it! You now have a higly available kubernetes cluster running. You can now deploy and run containerized applications.


